Manufacturing & Sourcing
From Idea to Launch: How to Start a Clothing Brand With a Manufacturer
A clothing line reaches customers only after each style has a fabric, a fit, a sample, a price and a shipping plan. The logo and the lookbook come earlier. They do not replace those decisions.
The steps affect each other. A heavier cloth can change the fit. A smaller quantity can rule out a custom dye. A comment that arrives after the sample is approved can push sewing, and then the launch date moves with it.
The work is simpler when the decisions stay in order. This note covers that order: define the product, choose a factory that can make it, prepare the design notes, lock the fabric, approve the sample, confirm quantity and timing, then run bulk, inspection and delivery.
1. Define the Product Before Looking for a Manufacturer
A factory can suggest cloth and cut a sample once it knows which garment you mean. Every stitch does not have to be decided. The direction does.
A useful first brief covers:
- Product category
- Who wears it
- Fit and silhouette
- Fabric direction
- The details that define the style
- How the brand mark is applied
- Where the garment sits in the line, if you already know
- A rough quantity
- The date you want goods in hand
“I want to start an activewear brand” is still a category, not a product. A brief the sample room can use looks more like this: women’s leggings and a medium-support sports bra, nylon-spandex with recovery, two colors, starting from 50 pieces per design.
Start With a Focused First Collection
A long first line spreads sampling, fabric buying, costing and stock across too many styles at once. A short list lets you spend the sample rounds on fit, cloth, labels and whether the pieces belong together.
Once those styles are selling, extra colors and categories are easier to add. For the opening order, a clear garment is more useful than a long style sheet.
2. Choose the Right Type of Clothing Manufacturer
Sewing capacity does not tell you whether a factory knows your category. One shop may run large orders and still be new to performance knits. Another may be comfortable with small development and less ready for a washed, oversized hoodie.
The question that matters is whether the supplier can develop the garment and then repeat it.
When you compare factories, look at:
- Experience in the category
- Sampling, pattern making and fit support
- Fabric sourcing
- Print, embroidery, wash and other decoration
- MOQ
- Capacity
- How inspection is done
- Lead times
- How clearly the team replies
- Labels and packaging
- Whether a later, larger order can stay in the same factory
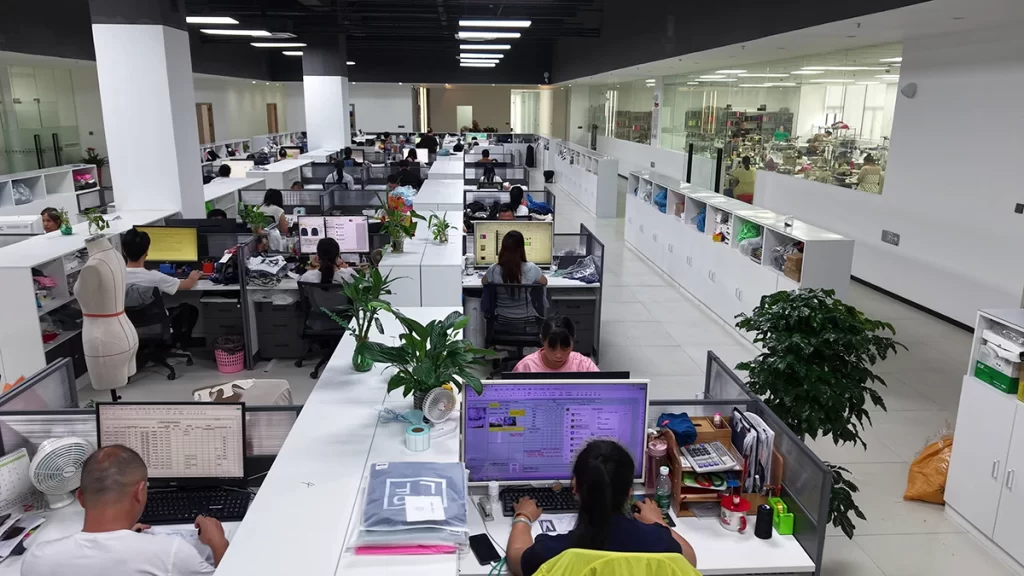
Leggings and sports bras raise questions about stretch recovery, compression, opacity and seam type. Hoodies and heavy tees raise questions about GSM, garment wash, embroidery and oversized proportions. Jhwear develops both in Dongguan: T-shirts, hoodies, yoga wear, activewear and private-label programs, with printing, embroidery, washing and sequin embroidery.
Product Development Capability Matters for New Brands
A label that already has a tested style and a locked tech pack mainly needs production. A new brand is often still choosing cloth, adjusting the fit and deciding how the logo should sit.
In that case, a sample room that can review the style is more useful than a line that only sews a finished pack. Ask the factory to comment on whether the style is practical, which fabrics fit the quantity, how it should be constructed, what the measurements imply, how the artwork should be applied, and where the risk is in bulk. A useful reply explains the recommendation.
MOQ Should Match Your Stage of Growth
A factory set up only for very large runs can be a poor match for a first collection. A very low minimum can also close off custom colors and some trims. The practical match is a quantity that lets you test the style and still make it to the standard you want.
At Jhwear, cut-and-sew programs can start from 50 pieces per design. Seamless styles start at 500 pieces per style, per color, per size. The final minimum still depends on the fabric and the customization.
3. Prepare Your Design Information
Once the product direction is clear, gather what the sample room needs. A finished tech pack helps. Development can also start from a sketch, photos or a garment you already own. The team needs to know the style, and which details are still open.
A first set of notes can include:
- Sketches or reference photos
- A garment you can ship as a sample
- Fit and silhouette
- Any measurements you already have
- Fabric preferences
- Colors
- Logo or artwork files
- Print or embroidery
- Labels and trims
- Packaging
- Estimated quantity
- A target price, if you have one
- The launch date
Clearer notes make the fabric suggestion, the estimate and the first sample closer to the garment you mean. A separate note covers how to prepare design files for clothing manufacturing.
Be Clear About What Each Reference Means
Several photos with no labels are easy to misread. Say what each one owns. One photo can be the fit, another the cloth surface, another the wash. A marked-up PDF or a short message that names the photos is enough.
You Can Still Start Without a Complete Tech Pack
Many first styles begin from reference images, a sketch or an existing garment. That is a normal start. The aim is to show which decisions are already made, so the open ones can be settled before the sample is cut.
4. Select and Confirm the Fabric
Cloth changes the look, the fit, the comfort and the cost. A photo of a fabric is a weak test. Weight, stretch, drape and wash behavior show up after the garment is cut. Review the cloth together with the fit, the construction and the end use.
A useful fabric note can include:
- Fiber content
- GSM or another weight
- Knit or woven structure
- Stretch and recovery
- Hand feel, thickness and drape
- Surface
- Shrinkage, colorfastness and pilling
- Moisture management or other performance
- Wash, dye or finish
Describe the result you want. “Soft” and “premium” mean different things until there is a weight, a hand feel or a swatch behind them.
Stock Fabric or Custom Fabric?
For a smaller trial, cloth that is already available is often the practical path. It shortens development and avoids a dye minimum you do not need yet.
A custom cloth or a custom color fits when the style needs a weight, a hand, a performance level or a shade that stock cannot match. Those developments usually need a higher quantity. Choose the fabric with the garment and the order size in mind.
Test the Fabric in the Actual Sample
A swatch shows hand feel. It does not show how the same cloth behaves once it is cut and sewn. Stretch, recovery, shrinkage and structure can change the fit on a finished garment.
On activewear, check opacity, compression, recovery, moisture management and whether the waistband stays in place. On streetwear, check GSM, structure, hand feel, shrinkage, the wash and whether the shape holds. Approve the cloth on the sample when you can.
Confirm the Bulk Fabric Before Production
Write down the cloth used on the approved sample before bulk starts. A later lot that differs in weight, stretch, color or finish will change the garment. For a custom color, a wash or a developed fabric, approve the lab dip or the bulk cloth reference before the order is cut.
5. Develop and Approve the Sample
When the direction, the fabric and the main details are clear, the first sample checks whether the style works before the cloth is cut in bulk.
Use it to review:
- Fit and silhouette
- Measurements
- How the fabric behaves
- Construction
- Print or embroidery placement
- Labels and trims
- Wash or finishing
- Workmanship
The first sample is there to show what to adjust. It does not have to be the approved one. At Jhwear, sampling usually takes about 7 working days after fabric, design and details are confirmed.
Review the Sample Systematically
Check the areas separately so the comments can be followed:
- Fit: does the silhouette match the brief?
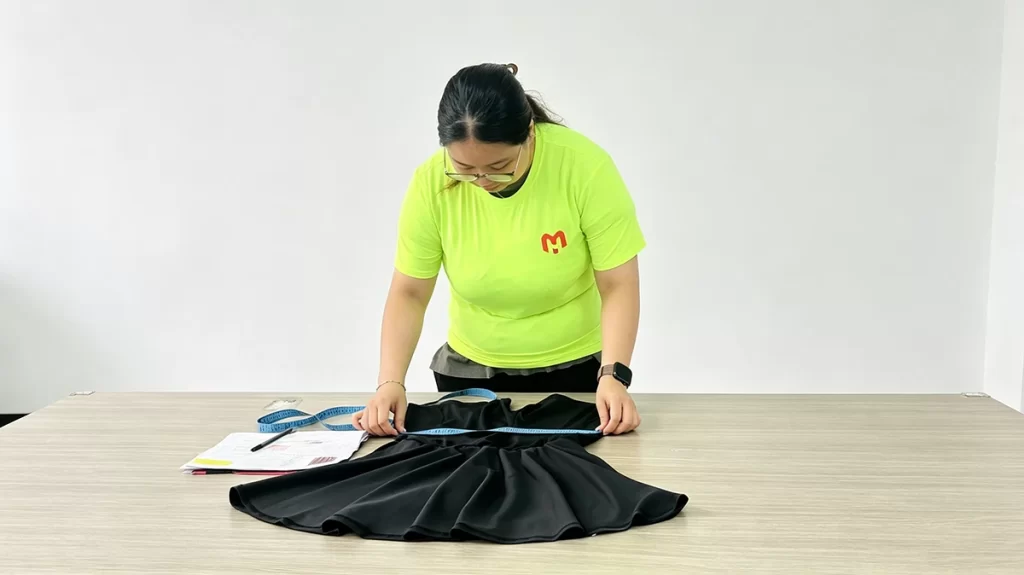
- Measurements: are the key points in range?
- Fabric: weight, stretch, recovery, drape or structure
- Construction: seams, panels, pockets, waistband or collar
- Branding: logo, embroidery, labels and trims in the right size and place
- Finishing: wash, dye, print or surface
Keep Sample Feedback Clear and Consolidated
Comments sent in many separate messages slow the next round. Collect them into one list.
“The fit feels off” leaves the pattern room to guess. A note the team can grade looks like this: “Shorten the body by 2 cm, add 1.5 cm to the sleeve width, and keep the shoulder as it is.”
Approve the Final Sample Before Bulk Production
The approved sample is the standard the sewing line follows. Before bulk, confirm the measurements, fabric, color, construction, artwork size and placement, labels, trims, wash or finish, and packaging. If the style has a size run, review the grade before cutting. Both sides should be working from that same piece.
6. Confirm MOQ, Cost and Production Details
An approved sample still needs a production plan. Quantity, the color split, packaging and the delivery date can hold the order if they are still open.
Before sewing starts, confirm:
- Final quantity
- Quantity by style and color
- Size breakdown
- Fabric specification
- Unit price
- Print or embroidery
- Labels and trims
- Packaging
- Production lead time
- Payment
- Shipping method
- The date you need the goods
MOQ Can Change Depending on the Product
The style name is not the whole minimum. Fabric, dye, trims and decoration can raise the practical quantity. A tee on stock jersey can start lower than a color that has to be dyed to order.
Confirm the minimum after the main spec is known. At Jhwear, cut-and-sew MOQ starts at 50 pieces per design. Seamless MOQ is 500 pieces per style, per color, per size.
Confirm the Final Price After Key Specifications Are Approved
An early number is useful while the style is still open. The production price should describe the approved garment. Fabric, weight, print, embroidery, wash, trims, labels, packaging and quantity can all move the cost. Before the bulk order is placed, check that the quote lists what is included and what is still separate.
Confirm the Production Timeline Before Placing the Order
Lead time and the date you need the goods belong in the same conversation. A normal path includes fabric, trims, cutting, sewing, print or embroidery, wash, inspection, packing and shipping.
If the launch date is fixed, count backward from the day the cartons must arrive. Transit and a possible extra sample round belong in that count. At Jhwear, bulk production is usually 25–35 working days after sample approval. Custom cloth, wash, trims or extra sample rounds can add time.
7. Move Into Bulk Production and Quality Control
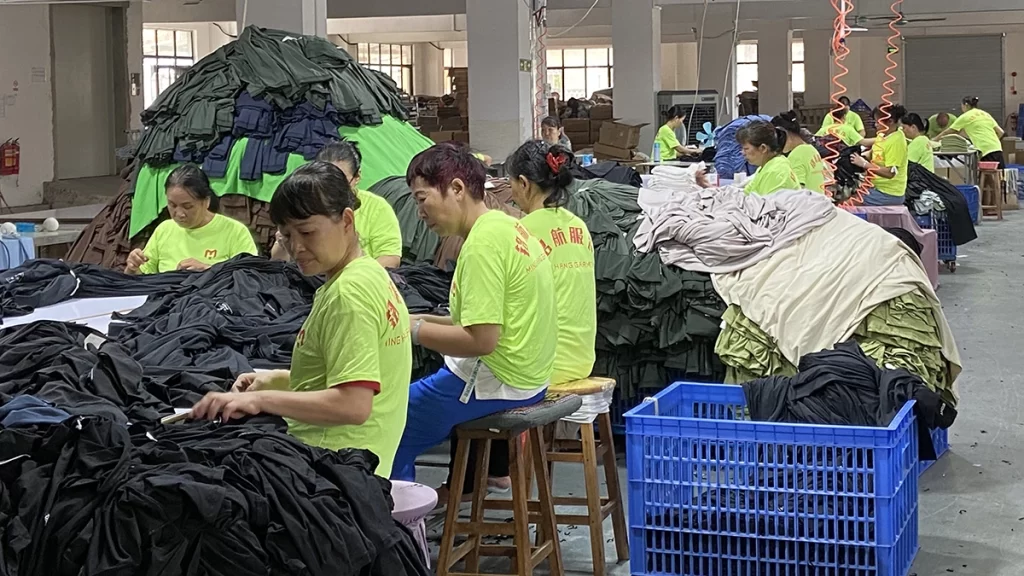
After the sample, fabric, measurements, branding and order details are approved, the job is to repeat that standard across the order. Development is finished. Consistency is the work.
Checks belong at each stage:
- Incoming fabric
- Cutting
- Sewing
- Print or embroidery
- Washing or finishing
- Measurements
- Final inspection
- Packing
A problem found while panels are still on the table costs less than the same problem found when the order is already sewn.
Sample Approval Does Not Eliminate Production Risk
The approved sample is the reference. Bulk still uses a larger fabric lot and more than one operator. Cutting, sewing, decoration and finishing have to stay stable across the run.
Cut panels can be checked before sewing. Construction can be checked on the line. Finished garments can be reviewed for measurements, workmanship, appearance and packaging before they ship.
Use an Approved Standard Throughout Production
Before the line starts, the factory should be working from the approved sample, the measurement chart, the fabric spec, the color standard, the artwork, the label and trim notes, the packing instructions and the inspection standard. If one of those changes, write the change down so an older file does not stay in use.
Final Inspection Should Confirm the Product Before Shipment
The check before the cartons leave is the place to catch what earlier steps missed:
- Measurements
- Sewing
- Fabric defects
- Print or embroidery
- Color
- Labels and trims
- Finishing
- Packaging and quantity
At Jhwear, inspection runs from incoming materials through sewing, finishing and a final check before shipment.
8. Plan Shipping Around Your Launch Date
A finished order is not yet in your warehouse. Packing, export documents, freight, customs and the last delivery still sit between the factory and the launch.
If the launch date is fixed, count from the day the goods must arrive. Factory completion is one date on that calendar, not the last one.
The window after sewing can include:
- Final inspection and packing
- Export documents
- Freight booking
- Air or sea transit
- Customs clearance
- Local delivery and warehouse receiving
- Time for photos or the campaign
On an international order, those steps add real days after the last garment is packed. Jhwear ships worldwide from Dongguan.
Build Extra Time Into the Schedule
An extra sample round, slower fabric or a changed sailing can move the arrival. Leave space between the estimated delivery and the launch so one delay does not cancel the drop.
Choose the Shipping Method Based on Timing and Cost
Air is faster and costs more. Sea costs less on a larger shipment and takes longer. The choice depends on volume, weight, the deadline, the budget, the destination and how soon you need stock. Some brands fly a small launch quantity and send the rest by sea. Confirm the method before production ends so the freight can be booked in time.
How Long Does It Take to Start a Clothing Brand With a Manufacturer?
There is no single calendar. Product complexity, fabric availability, sample rounds, custom trims, decoration, quantity and the shipping method all move the date.
A straightforward style still passes through design review, fabric sourcing, sampling, revisions, approval, material preparation, bulk production, inspection, packing and shipping.
At Jhwear, sampling usually takes about 7 working days after fabric, design and details are confirmed. Bulk production is usually 25–35 working days after sample approval. Those figures are factory time. Shipping sits after them, so adding the two numbers does not give a warehouse arrival date.
What Can Make the Timeline Longer?
- Extra sample rounds
- Custom fabric or a custom dye
- A specialty wash
- Complex embroidery or print
- Custom hardware or trims
- A wide size range
- Slow approvals
- Material that is not in stock
- Freight or customs
A hoodie on available fleece is a shorter job than a custom-colored heavyweight style with a wash, embroidery, special hardware and branded packaging.
Plan From the Required Delivery Date
Start from the day you need the cartons, then step backward through shipping, packing, inspection, production, sample approval and development. That shows which decisions have to be made first.
Final Thoughts
Starting with a manufacturer is easier when each stage closes a guess. You do not need every detail on the first day. You do need the important ones settled before the cloth is cut in bulk.
A practical path looks like this:
- Define the product
- Choose a manufacturer that can develop it
- Prepare the design notes
- Select and confirm the fabric
- Develop and approve the sample
- Confirm quantity, price and timing
- Run bulk with inspection
- Ship against the launch date
Early decisions are cheaper than the same decisions after production has started.
Ready to Turn Your Clothing Idea Into a Real Product?
Send the product type, quantity, fabric notes and the references you have. Sampling at Jhwear usually takes about 7 working days after those details are confirmed. Bulk production is usually 25–35 working days after sample approval. Cut-and-sew MOQ starts at 50 pieces per design. Seamless MOQ is 500 pieces per style, per color, per size.
Reach the team through the contact page, WhatsApp +86 13332693486, or w1437s@gmail.com.
Common Questions
No. A tech pack helps, and development can also start from sketches, photos, a reference garment or a few measurements. We will tell you which details still need a decision before the sample is cut.
At Jhwear, cut-and-sew MOQ starts at 50 pieces per design. Seamless styles require 500 pieces per style, per color, per size. Fabric, dye and decoration can change the practical minimum.
There is no fixed number. A simple style may be approved in one or two rounds. Custom fabric, a wash or a difficult fit can take more. Approve a sample the factory can repeat.
It depends on the style, the fabric, sample rounds and shipping. Sampling at Jhwear usually takes about 7 working days after the details are confirmed. Bulk production is usually 25–35 working days after sample approval. Transit time sits after that.
Price matters, and it should be read with the fabric, construction, development support, MOQ, inspection and lead time. A lower number often describes a different garment. Compare quotes that specify a similar product.